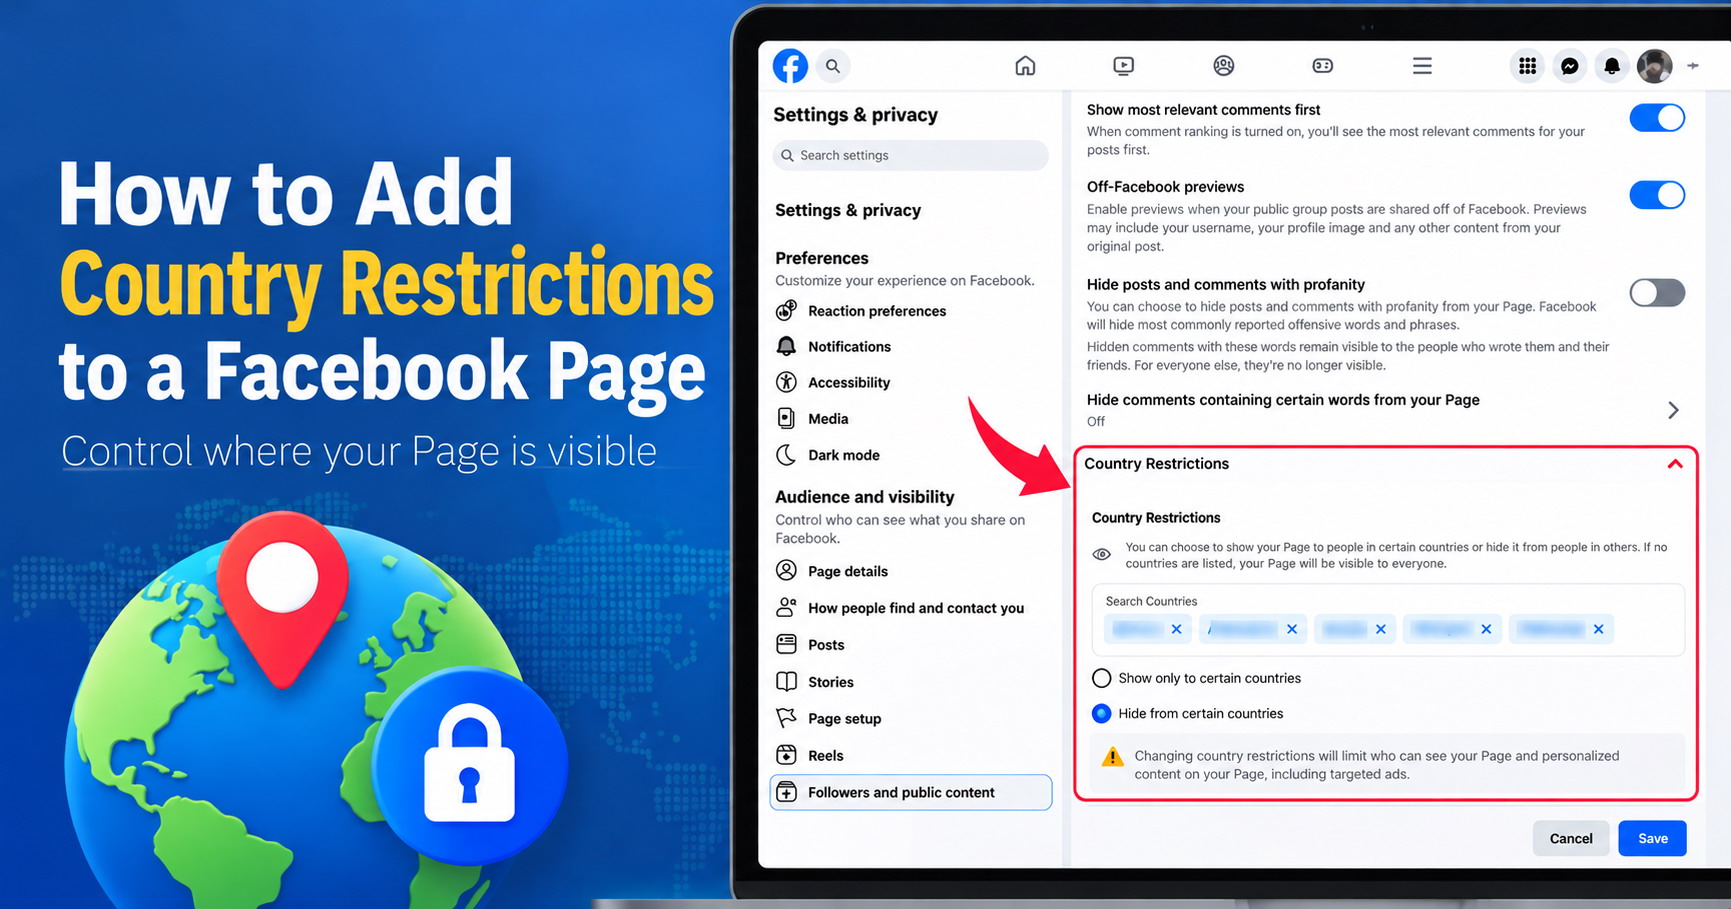
Sometimes you may not want your Facebook Page to be visible in every country. Maybe your business only serves a few locations, your content is intended for a specific region, or you simply don't want people from certain countries to access your Page. Facebook has a built-in Country Restrictions setting that lets Page owners control this.
You can either make your Page available only in selected countries or hide it from specific countries. In this tutorial, I'll show you where to find this setting and how to use it.
What Are Facebook Page Country Restrictions?
Country Restrictions let you control where your Facebook Page can be viewed. Facebook gives you two main options:
-
Show only to certain countries: Your Page will be available to people in the countries you select and restricted elsewhere.
-
Hide from certain countries: Your Page will remain available generally, but people in the countries you select will not be able to view it.
This is different from changing the audience of an individual Facebook post. The setting applies to the visibility of the Page itself.
How to Add Country Restrictions to Your Facebook Page
The exact location of Facebook settings can change occasionally, but in the current desktop interface you can find the option under your Page's "Audience and visibility" settings.
Step 1: Open Your Facebook Page
- Log in to Facebook and switch to the Facebook Page that you want to manage.
- Note: Make sure you're using an account with the appropriate access to manage the Page settings. People with full Facebook access can manage Page settings.
Step 2: Open Settings & Privacy
- While using Facebook as your Page, click your Page profile picture in the top-right corner.
- Go to: Settings & privacy → Settings.
- This will open the settings available for your Page.
Step 3: Open Followers and Public Content
- Look at the menu on the left side of the Settings page.
- Under Audience and visibility, click on Followers and public content.
- Facebook groups a number of visibility-related settings in this section.
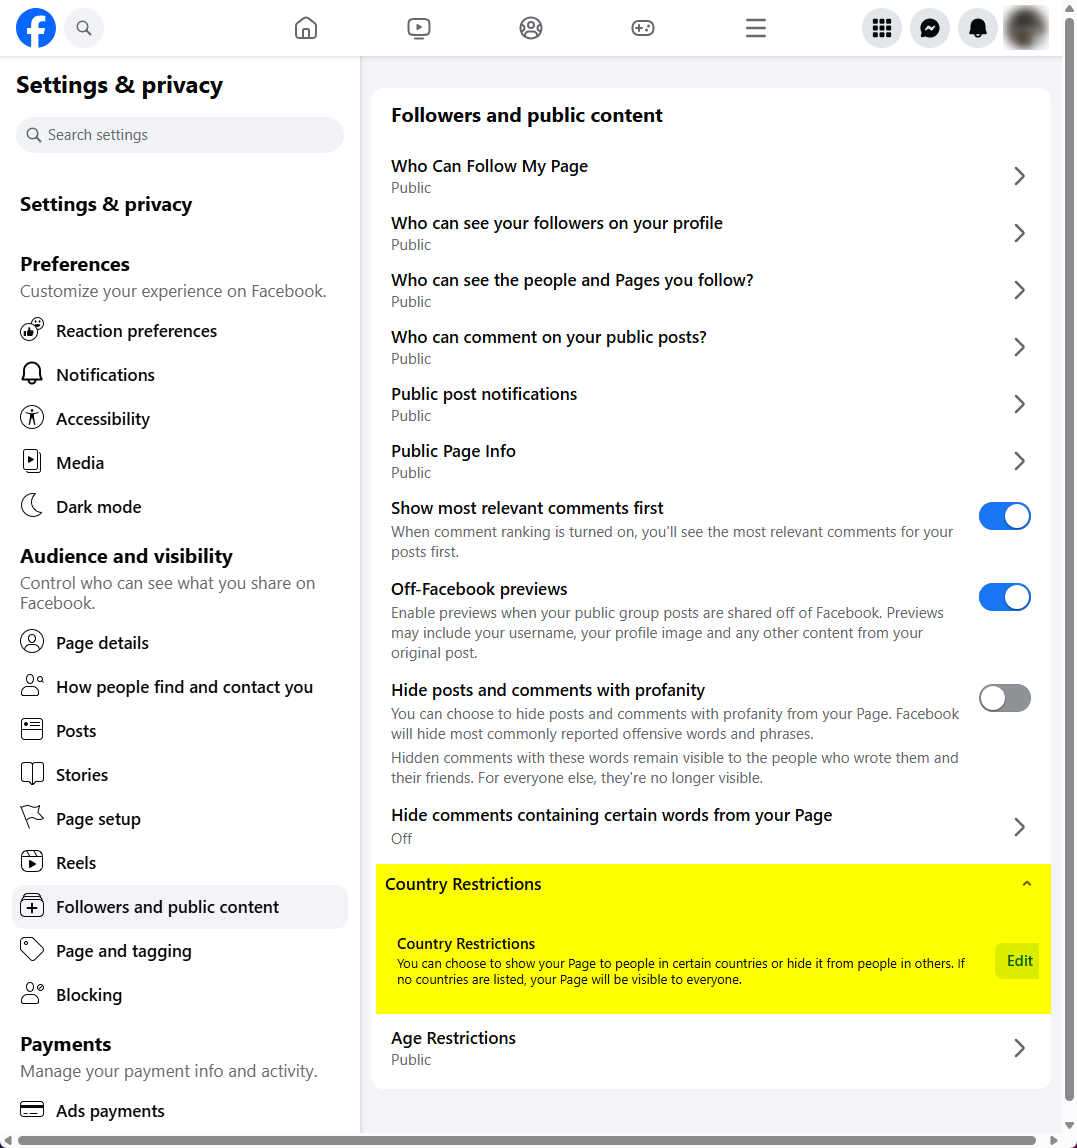
Step 4: Find Country Restrictions
Scroll down until you see the Country Restrictions section.
- Click or expand it if necessary.
- Click on Edit.
- You should now see a search box where you can enter the countries you want to add.
The screenshot below shows what this section looks like in Facebook's desktop settings.
Step 5: Add the Countries:
- Click the Search Countries field and start typing the name of a country.
- Select the country when it appears in the results.
- Repeat this process if you want to add more than one country.
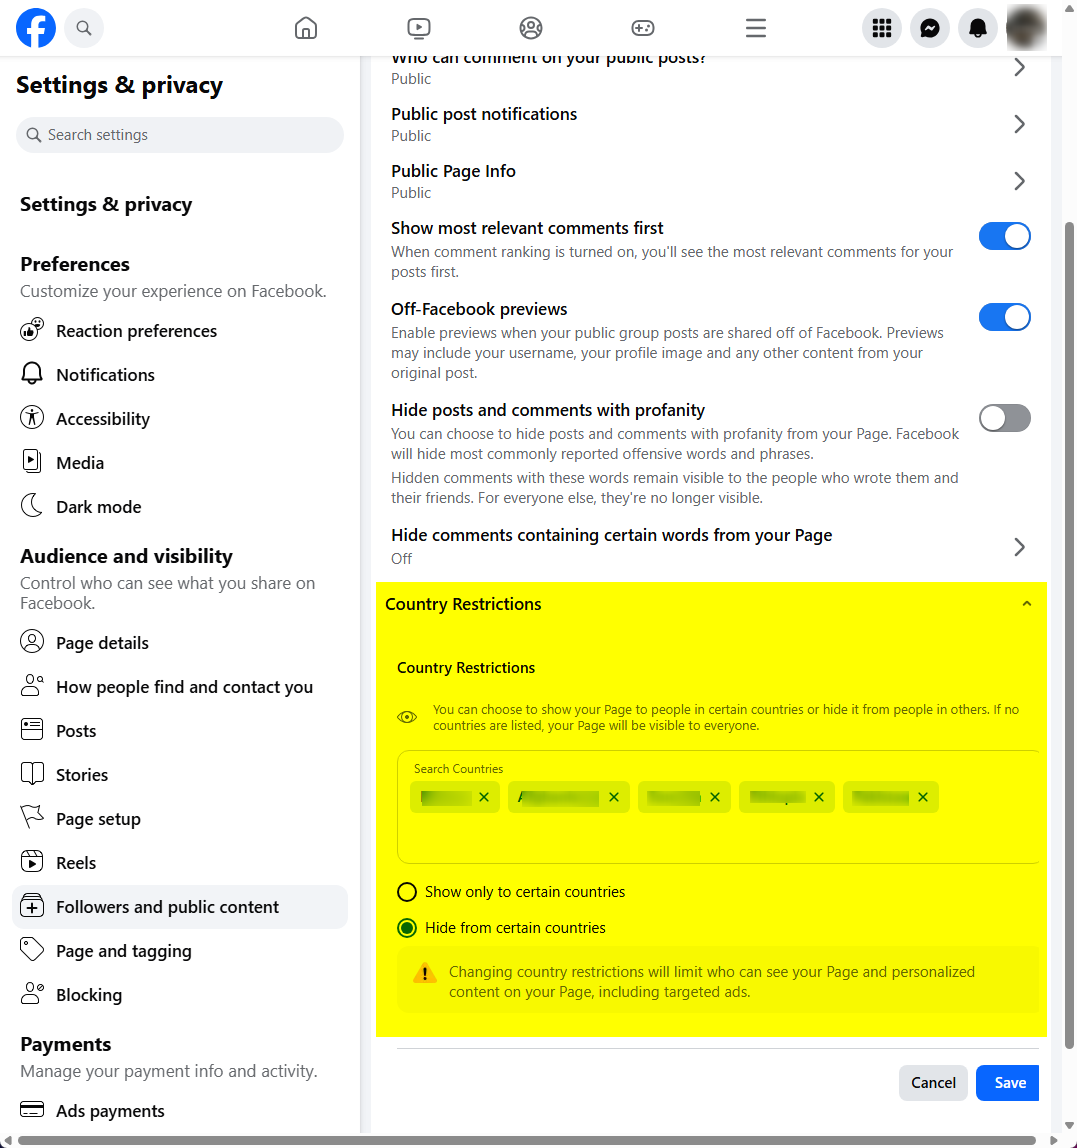
Note: If you add a country by mistake, click the X next to its name to remove it from the list.
Step 6: Choose How the Restriction Should Work
This part is important because Facebook gives you two opposite options.
-
Show only to certain countries
Choose Show only to certain countries when you want your Page to be available only in the countries you've entered.
For example, if you select Canada and Australia, you're telling Facebook that those are the countries where you want the Page to be visible.
-
Hide from certain countries
Choose Hide from certain countries when you want to block Page visibility in the countries you've entered.
For example, if you add several countries and select this option, Facebook will restrict your Page in those countries while leaving it available elsewhere.
Step 7: Save Your Changes
- Double-check the country list and make sure you've selected the correct restriction option.
- Then click Save.
- Once the setting is saved, Facebook will apply your new country restrictions to the Page.