

Hosting a website doesn't always mean paying for a monthly web hosting plan. If your website is built with HTML, CSS, and JavaScript, you can host it for free on Cloudflare, connect your own domain name, and enjoy HTTPS protection without purchasing a separate SSL certificate.
I recently used this method to launch DimenCare.com, a static website with a domain registered through Cloudflare. The entire hosting setup was completed through the Cloudflare dashboard without using an FTP client, GitHub repository, or command-line tool.
In this tutorial, I'll walk you through the same process using Cloudflare Workers with Static Assets and the newer Cloudflare dashboard.
Why Use Cloudflare for Free Website Hosting?
Although Cloudflare is best known for its CDN, DNS management, and website security services, it also provides infrastructure for hosting static websites.
With Cloudflare Workers Static Assets, you can upload your website files directly to Cloudflare and serve them through its global network.
Here are some of the benefits:
- Free static website hosting
- No limit on static asset requests
- Free SSL certificates with automatic renewal
- Custom domain support
- Global content delivery network (CDN)
- Built-in DDoS protection
- No separate FTP or cPanel account required
- Easy website updates through the dashboard
This makes Cloudflare particularly useful for landing pages, personal portfolios, small business websites, documentation sites, and other static websites.
What You Need Before Getting Started
Before you begin, make sure you have the following:
- A free Cloudflare account.
- A domain name connected to Cloudflare, if you want to use a custom domain.
- Your website files stored in a folder on your computer.
Your website folder might look something like this:
my-website/
├── index.html
├── care-poster.jpg
└── assets/
    ├── styles.css
    ├── main.js
    ├── favicon.svg
    └── hero-care.webp
Make sure your homepage is named index.html and is located in the root of your website folder.
You don't have to purchase your domain directly from Cloudflare. A domain registered elsewhere will also work once it is properly connected to Cloudflare.
Step 1: Open Cloudflare Workers & Pages
Log in to your Cloudflare dashboard.
From the account-level dashboard, navigate to Compute > Workers & Pages using the left-hand menu.
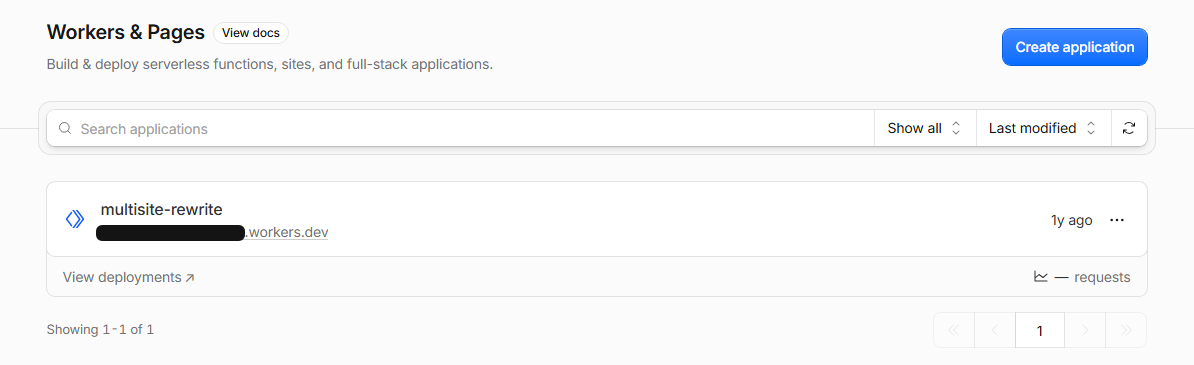
If you're currently managing an individual domain, you may need to return to your account dashboard first.
Step 2: Create a New Application
Click the Create application button.
Cloudflare will display several options for creating an application, including connecting a GitHub or GitLab repository, selecting a template, and uploading static files.
Select Upload your static files.
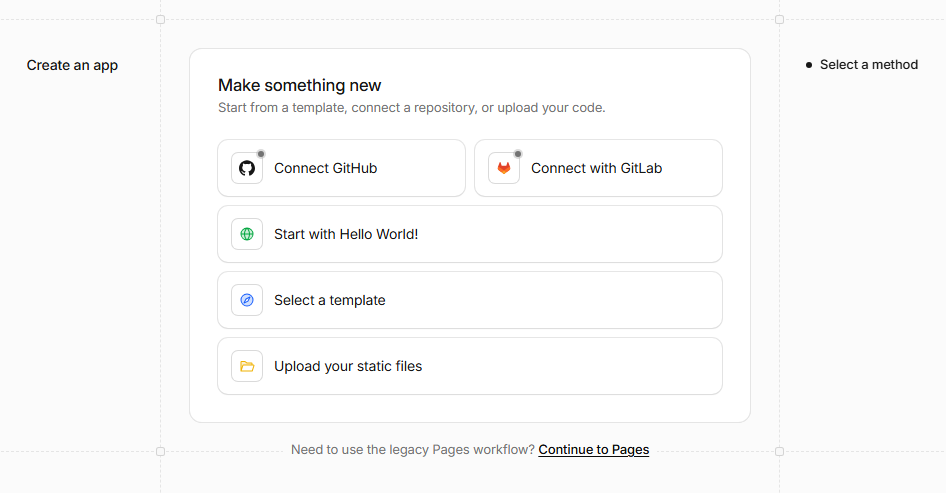
We're using the direct upload option because our website files are already prepared. There is no need to create a Git repository or use the legacy Cloudflare Pages workflow.
Step 3: Upload Your Website Files
On the Upload and deploy screen, drag and drop your website folder into the upload area. Alternatively, click the upload area and select your folder manually.
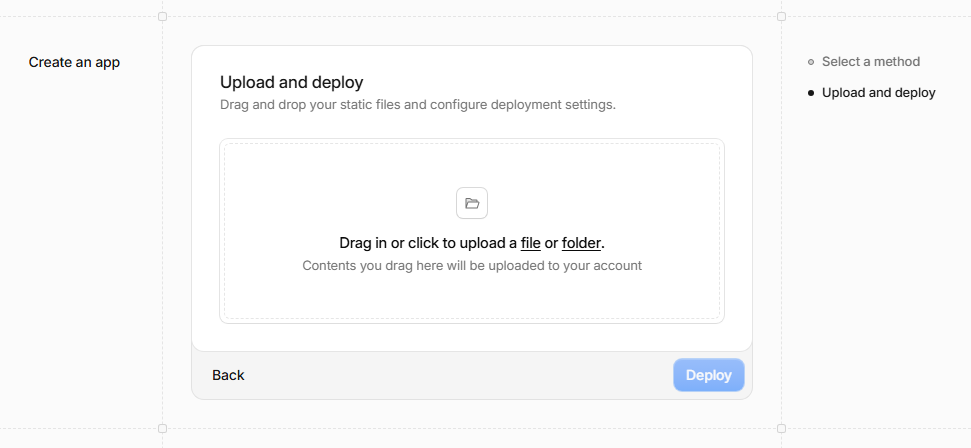
Once the files are loaded, check that your index.html file and all required CSS, JavaScript, image, and font files are included.
Keep the original folder structure intact. Changing the locations of files could cause broken images or missing styles.
Step 4: Configure and Deploy Your Website
Cloudflare automatically suggests a Worker name. You can replace it with a descriptive name that matches your website.
The screenshot shows an automatically suggested name. For my website, I used dimencare as the final Worker name.
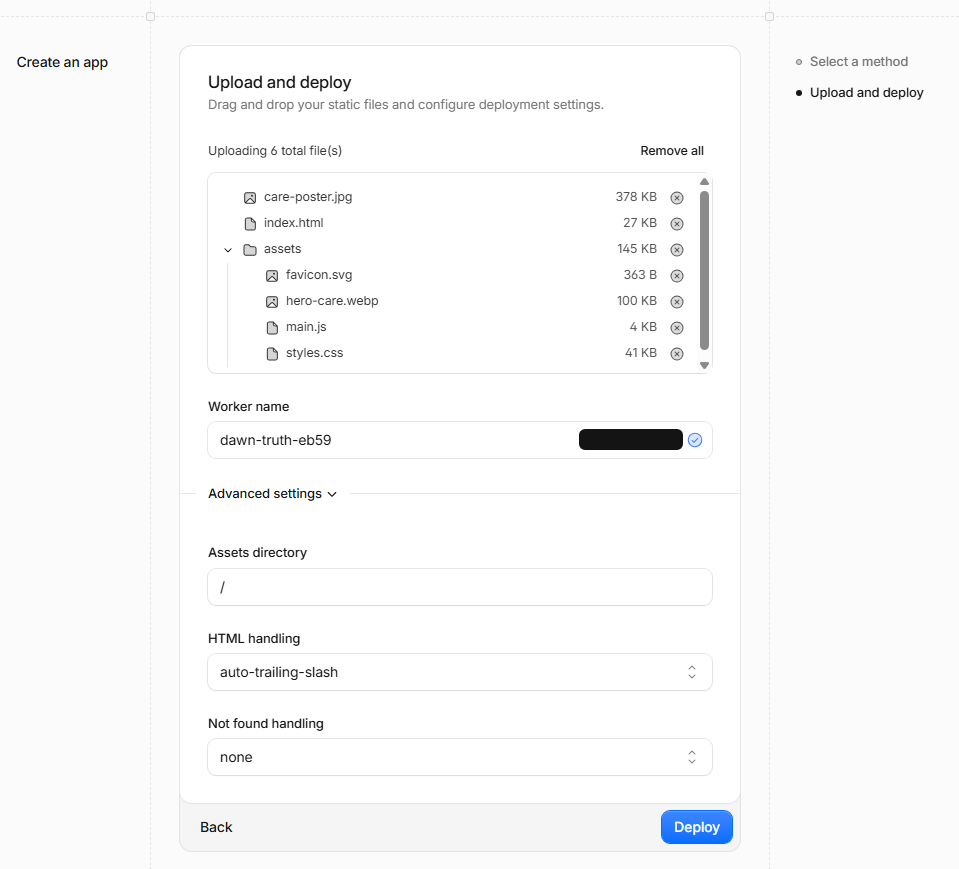
For a regular static HTML website, you can generally leave the advanced settings at their defaults:
- Assets directory: /
- HTML handling: auto-trailing-slash
- Not found handling: none
Click Deploy to publish your website.
Once the deployment is ready, Cloudflare will provide a default public website address ending in workers.dev.
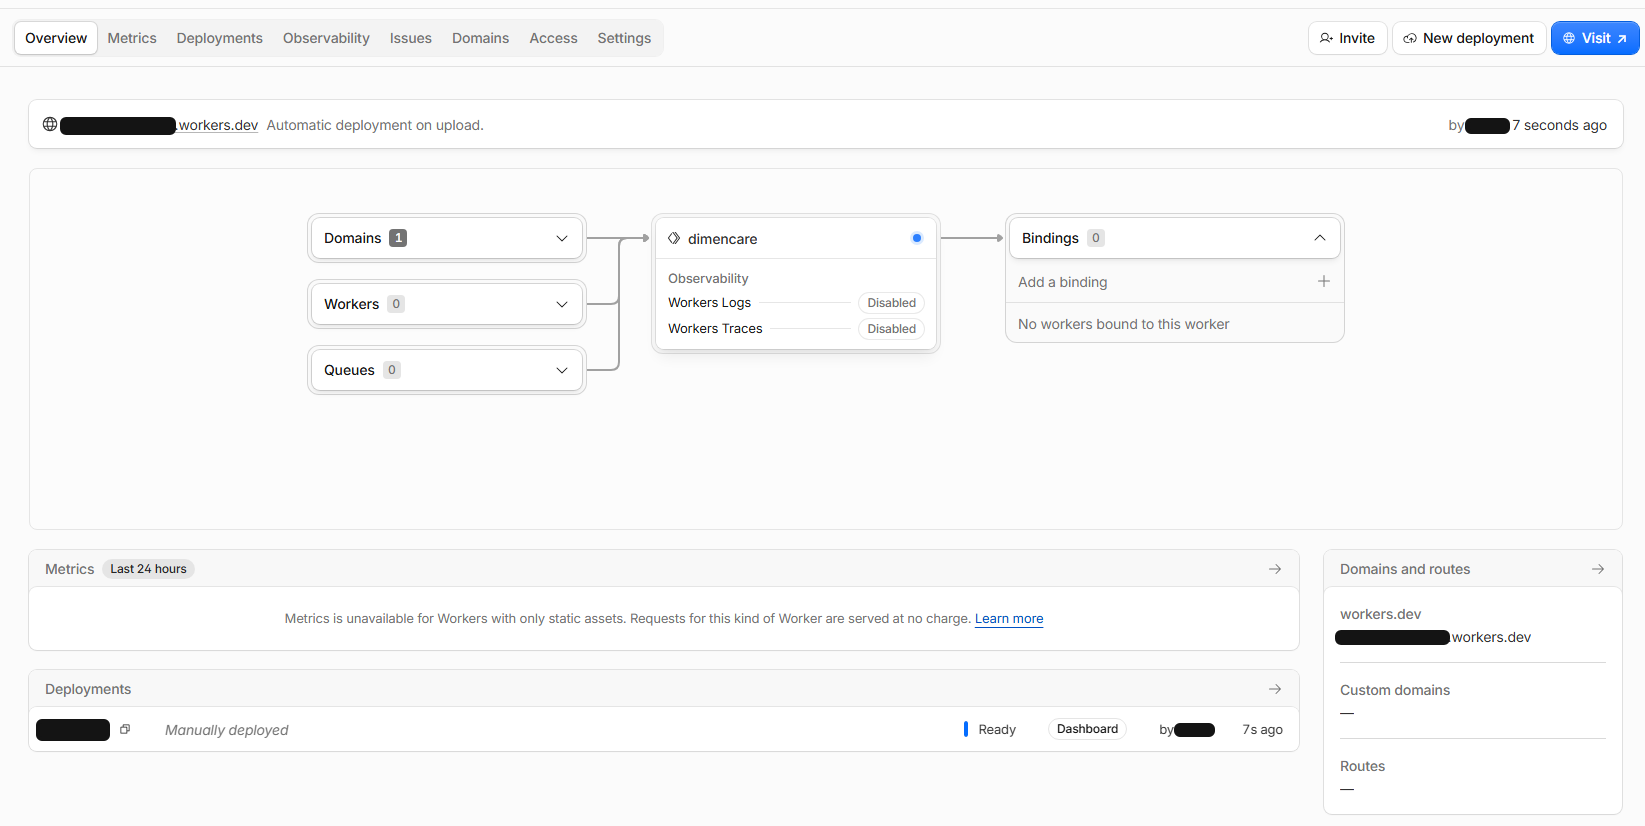
Click the Visit button or open the provided URL to make sure your website loads correctly before connecting your custom domain.
Step 5: Connect Your Custom Domain
Now that your website is hosted on Cloudflare, you can connect your own domain name.
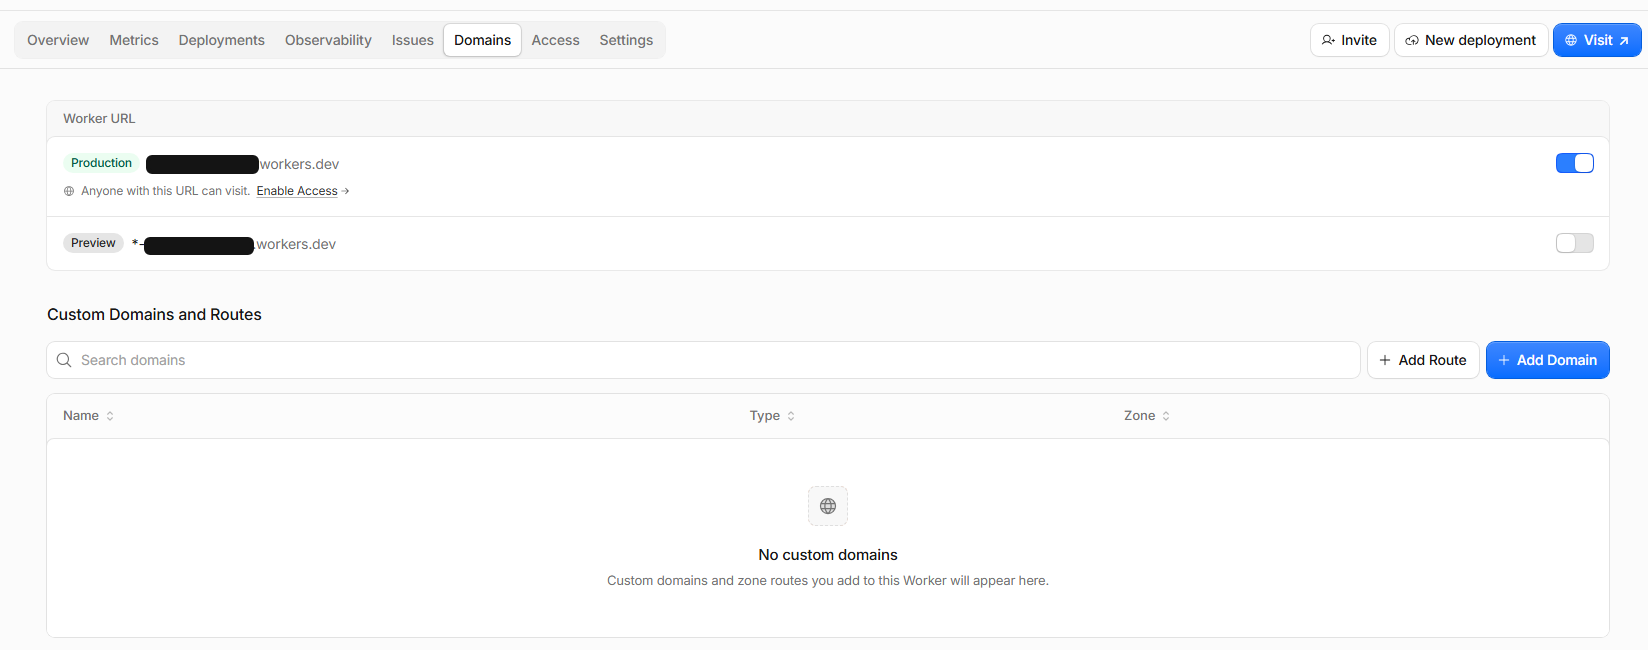
Open your newly created Worker and select the Domains tab.
Under Custom Domains and Routes, click Add Domain.
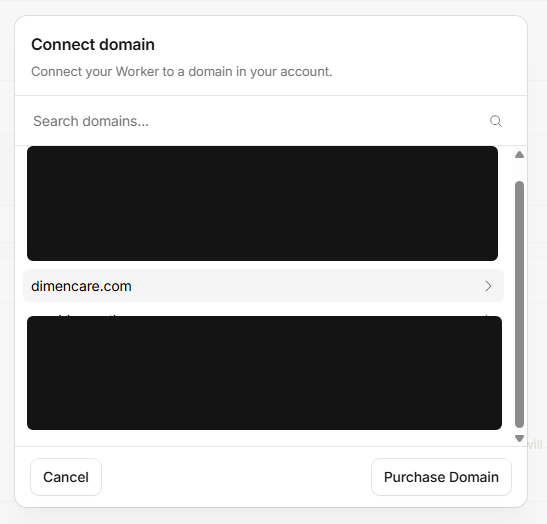
Select your domain from the list of available domains in your Cloudflare account.
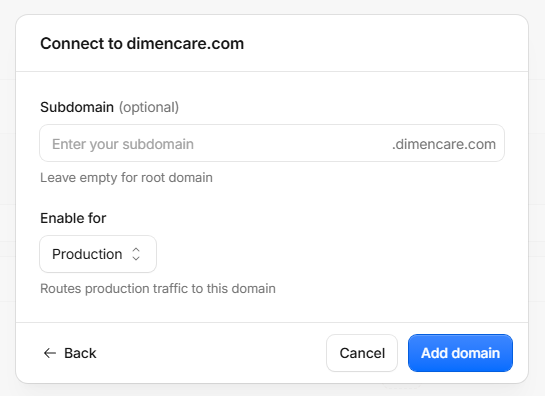
Leave the Subdomain field empty to connect your root domain. Make sure Production is selected, and click Add domain.
After connecting the root domain, confirm it appears under Custom Domains and Routes.
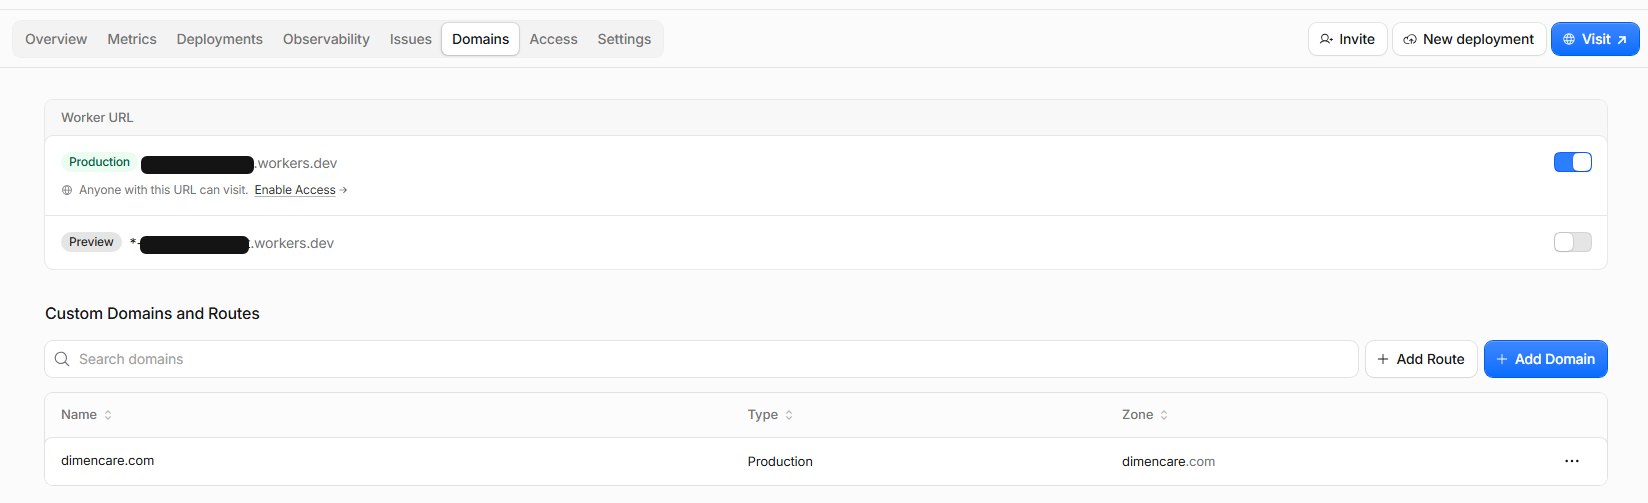
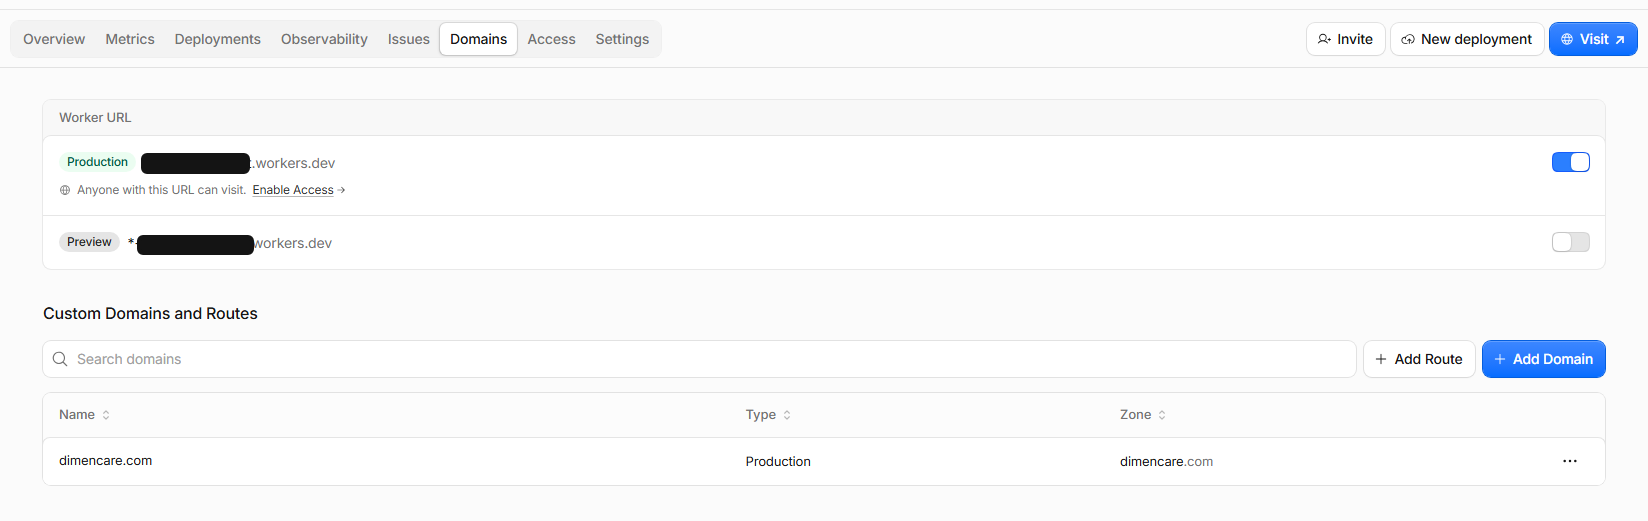
Click Add Domain again to connect the WWW version of your domain.
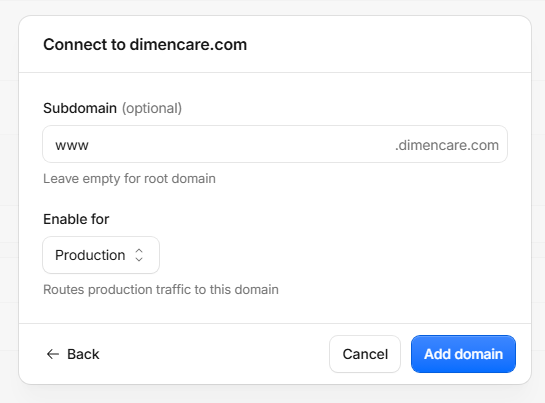
Select the same domain, but enter www in the Subdomain field this time. Keep Production selected and click Add domain.
Both versions of your domain should now appear under Custom Domains and Routes:
- example.com
- www.example.com
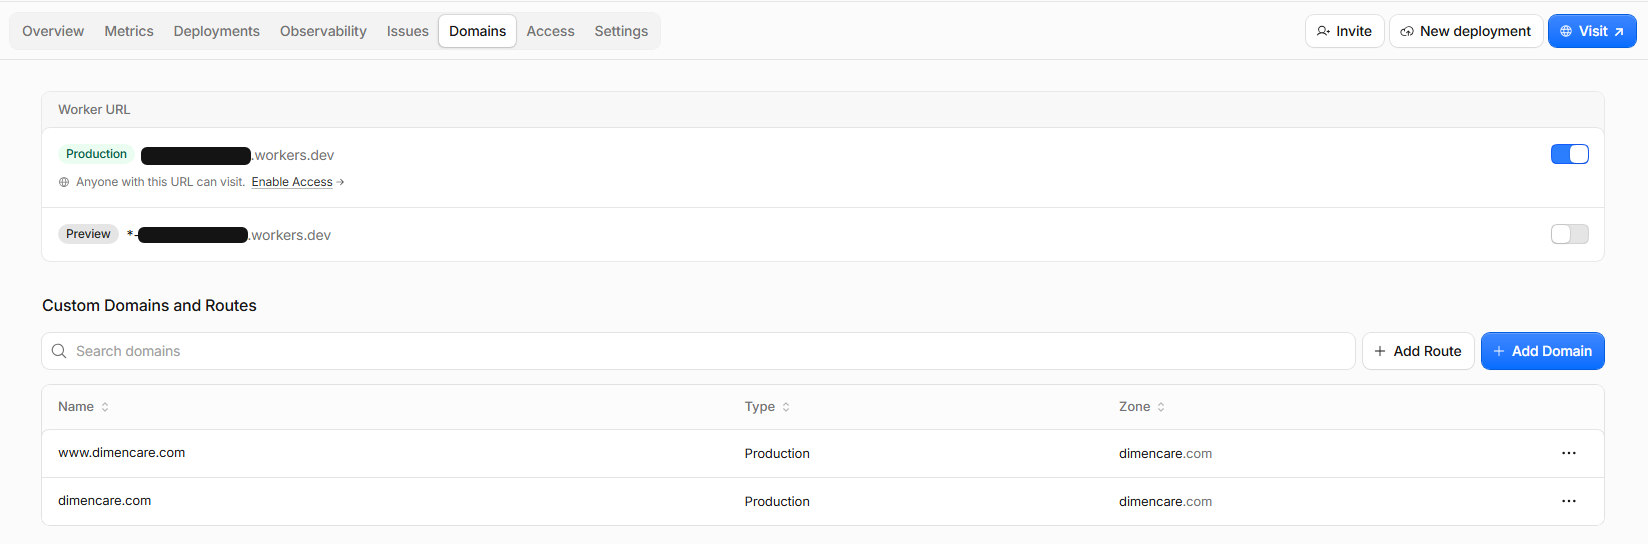
Cloudflare automatically creates the required DNS records and provisions SSL certificates for your connected custom domains. You don't need to find a hosting server IP address or manually install an SSL certificate.
Step 6: Configure Free SSL and HTTPS
Return to your domain's dashboard and navigate to SSL/TLS > Edge Certificates.
Check that your SSL certificate is active. Certificate provisioning may take some time, so don't worry if it isn't immediately available.
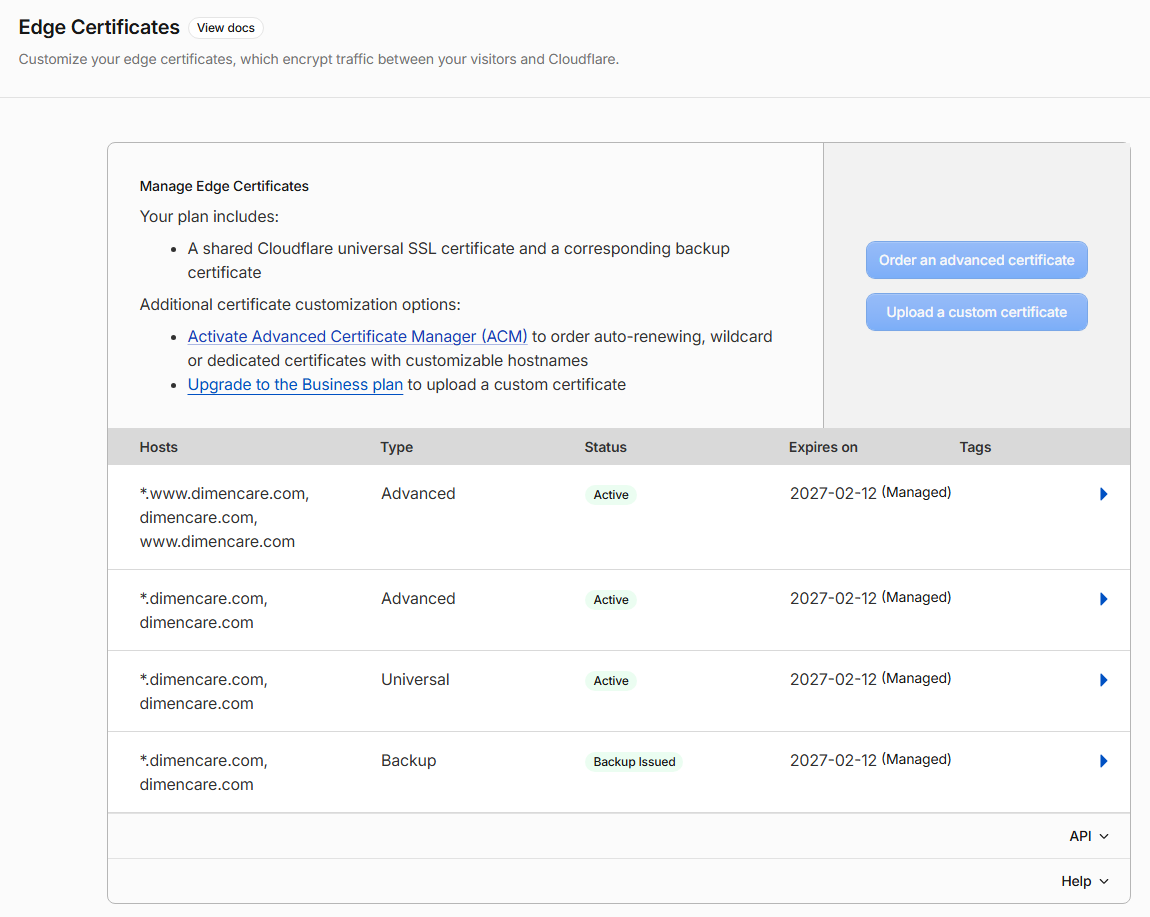
Scroll down and enable Always Use HTTPS. This ensures that visitors who access your website using HTTP are redirected to HTTPS.
I also recommend the following settings for a modern static website:
| Setting | Recommended Configuration |
|---|---|
| Always Use HTTPS | On |
| Minimum TLS Version | TLS 1.2 |
| TLS 1.3 | On |
| Automatic HTTPS Rewrites | On |
| HSTS | Leave disabled initially |
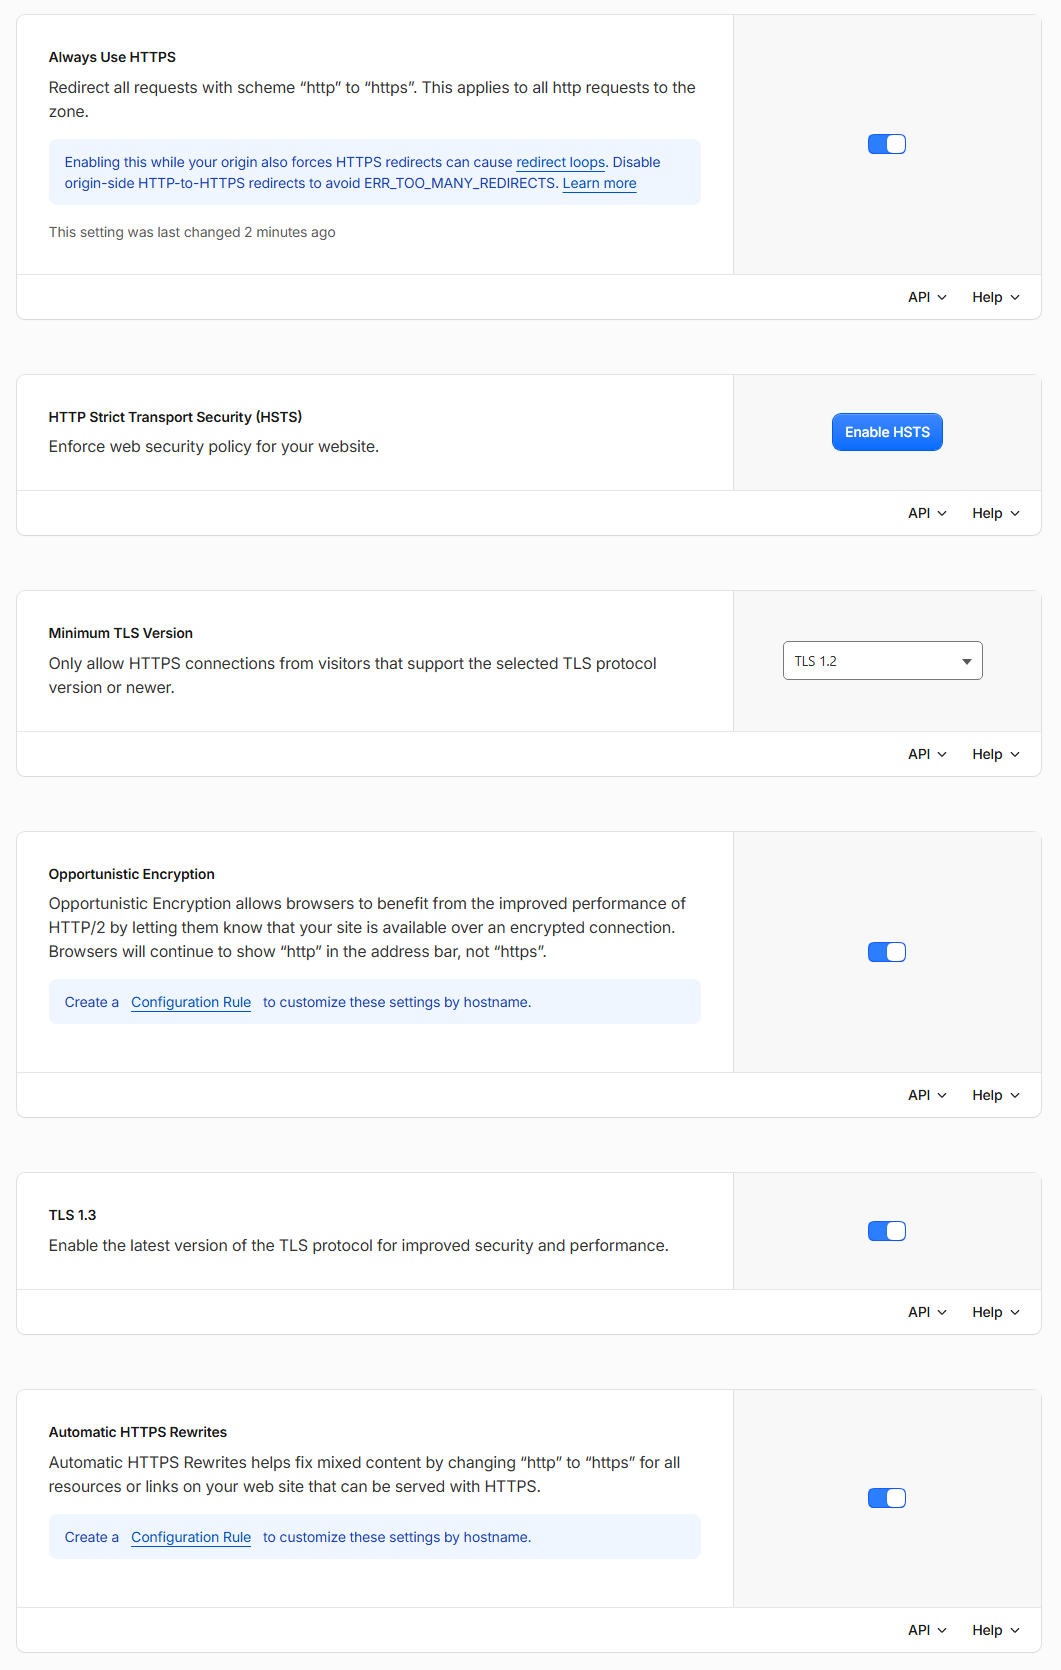
Setting the minimum TLS version to 1.2 is optional, but it helps prevent connections using outdated TLS protocols. Very old browsers may no longer be able to connect.
The certificate list in my setup also shows Advanced certificates, but you don't need to purchase Advanced Certificate Manager or enable Total TLS for this basic website setup.
Step 7: Redirect WWW to Non-WWW
Although both versions of your domain can work independently, it's a good idea to choose one preferred website address.
For this example, we'll redirect the WWW version to the non-WWW version using a permanent 301 redirect.
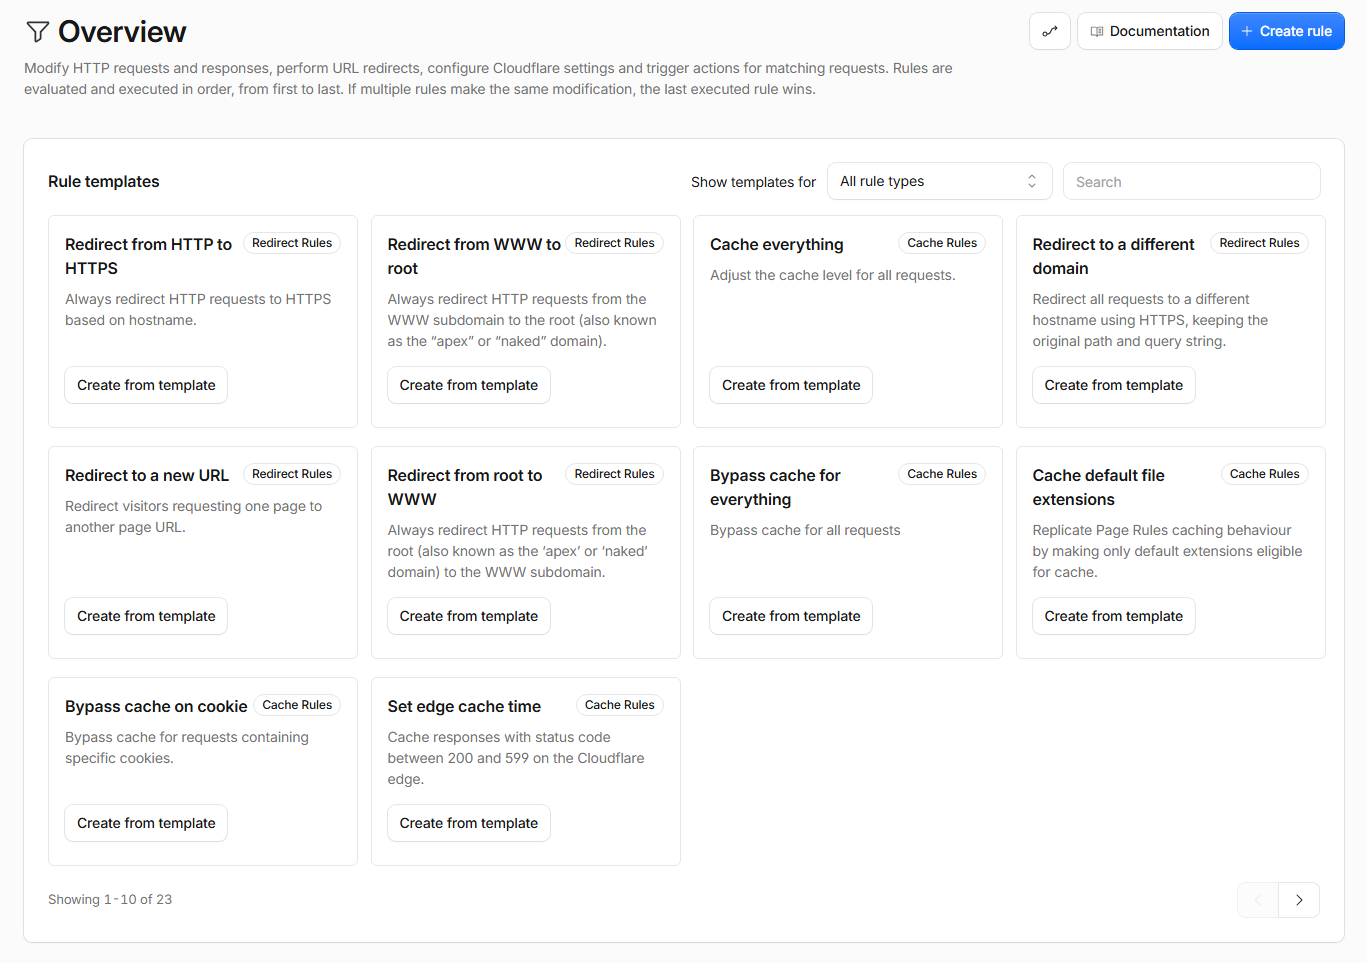
In your domain dashboard, navigate to Rules > Overview.
Find the Redirect from WWW to root template and click Create from template.
Use the following settings:
- Rule name: Redirect from WWW to root
- Matching type: Wildcard pattern
- Request URL:
https://www.* - Target URL:
https://${1} - Status code: 301 - Permanent Redirect
- Preserve query string: Enabled
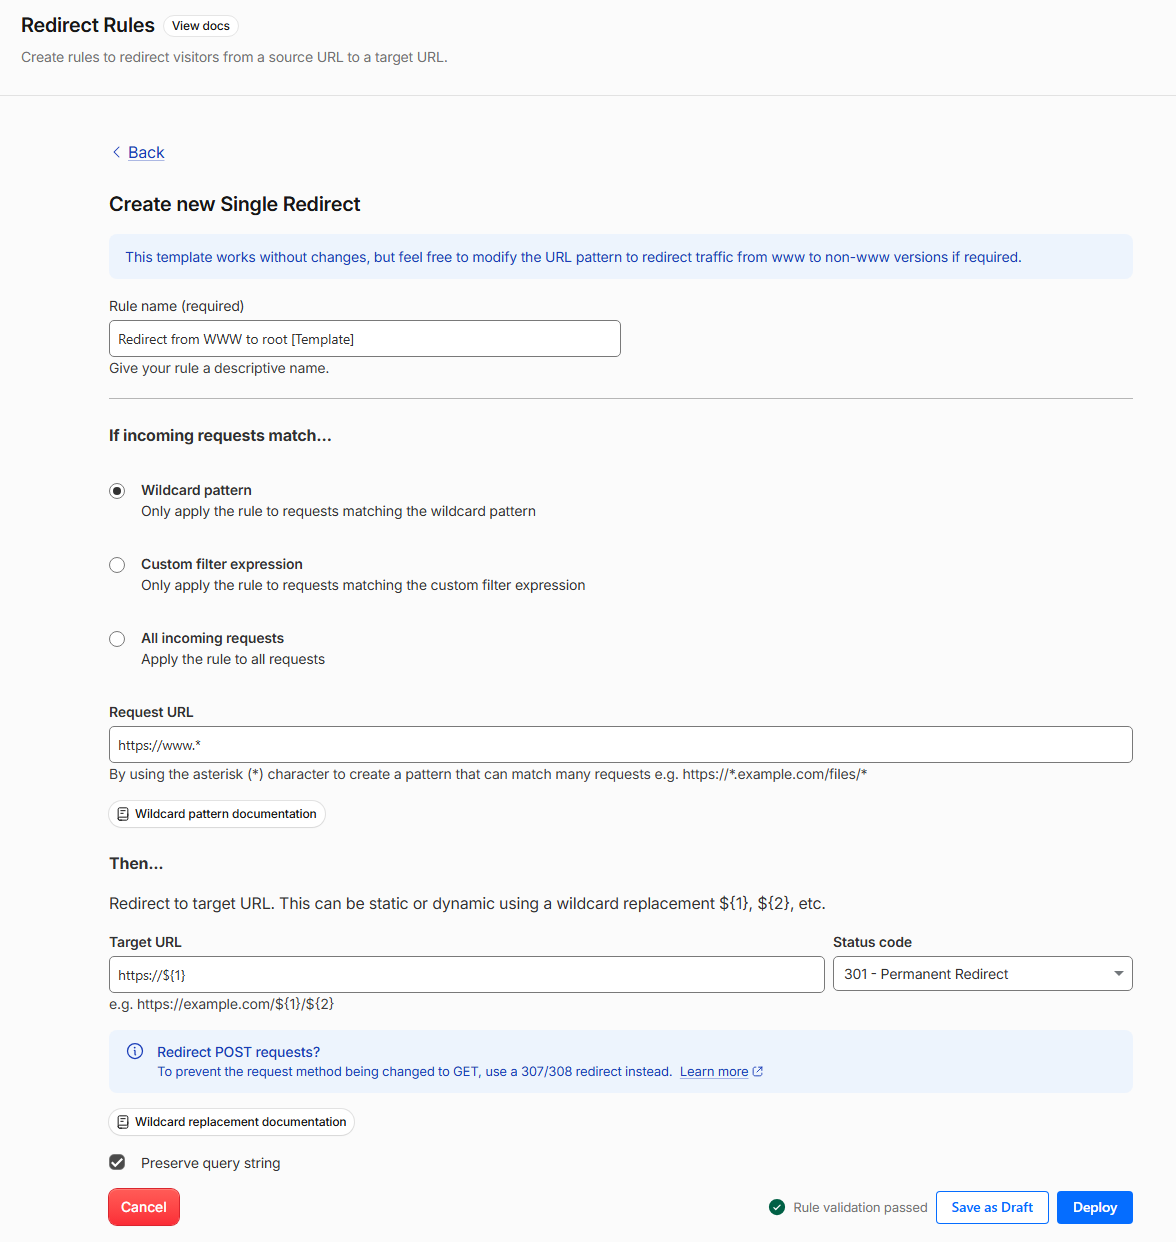
These settings follow Cloudflare's official WWW-to-root redirect example.
Click Deploy to activate the rule.
If Cloudflare displays a warning about proxied DNS records, verify that your WWW hostname already has a proxied DNS record. In my setup, Cloudflare had already created the required Worker DNS record, so there was no need to create another one.
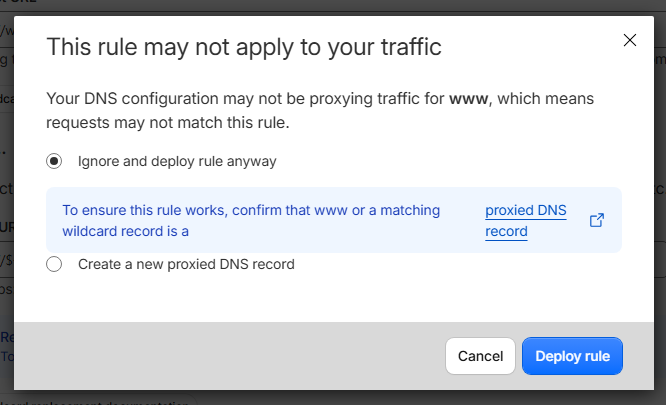
If the WWW record is already proxied, select Ignore and deploy rule anyway and click Deploy rule. Otherwise, resolve the DNS configuration before proceeding.
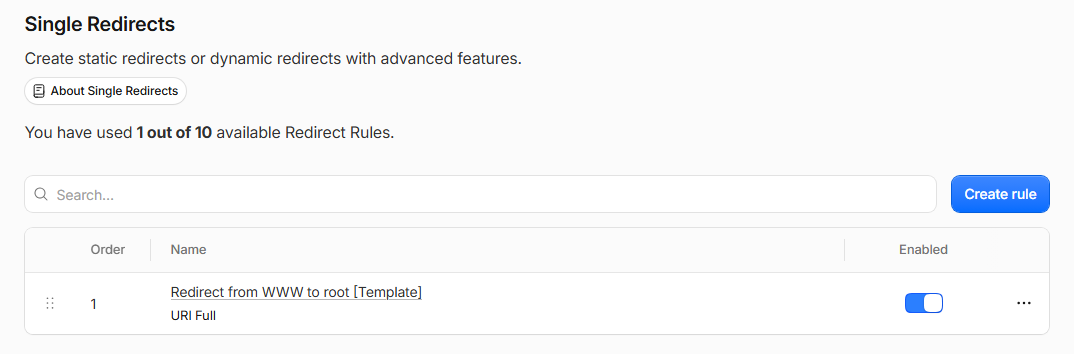
The redirect handles HTTPS requests, while the Always Use HTTPS setting configured earlier handles HTTP requests.
Step 8: Verify Your DNS Records
Navigate to DNS > Records in your domain's dashboard.
If you've followed the same setup, you should see two automatically created Worker records, one for your root domain and another for the WWW subdomain.
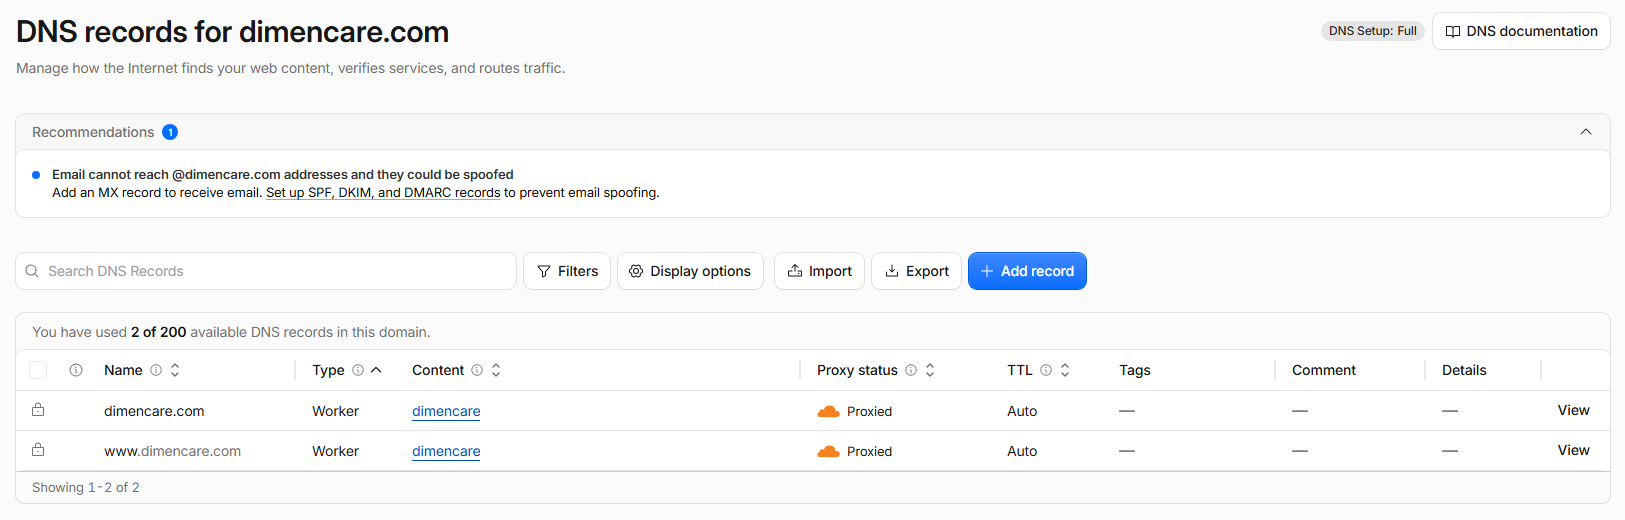
Both records should be proxied through Cloudflare, as indicated by the orange cloud icon.
There is no need to create additional A or CNAME records for these hostnames.
Step 9: Disable the Default Workers.dev URL (Optional)
Now that your custom domain is working, you may not want your website to remain publicly accessible through its original workers.dev address.
Return to Workers & Pages, select your Worker, and open the Domains tab.
Turn off the Production toggle under Worker URL. You can also leave the Preview URL disabled if you don't need it.
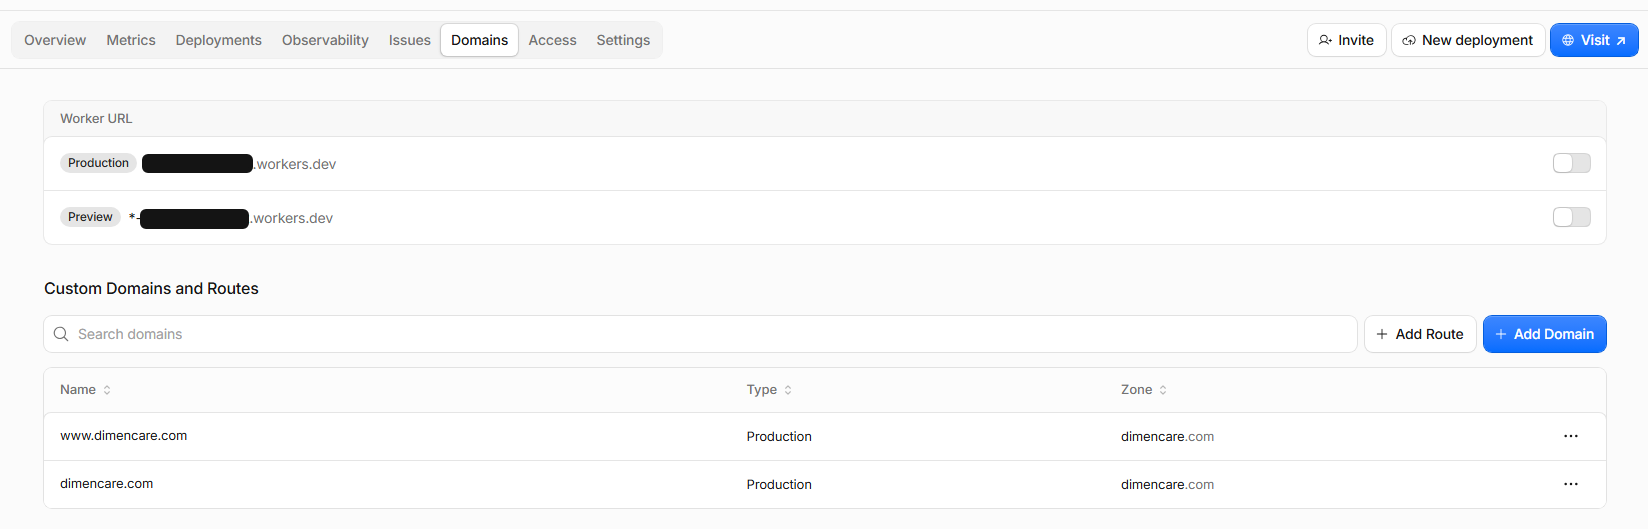
This doesn't disconnect your custom domains or remove your website. It disables access through the default workers.dev endpoint. If you deploy using Wrangler later, keep the workers.dev and preview URL settings disabled in your configuration as well.
Step 10: Test Your Live Website
Open a private or incognito browser window and test all four versions of your website address:
- http://example.com
- http://www.example.com
- https://www.example.com
- https://example.com
With the configuration described above, all four addresses should ultimately reach https://example.com.
Check your navigation links, images, stylesheets, JavaScript functionality, and mobile layout to make sure everything works as expected.
How to Update Your Website on Cloudflare
Whenever you need to make changes to your website, edit the original files on your computer first.
Then follow these steps:
- Open Cloudflare Workers & Pages.
- Select your existing Worker.
- Click New deployment.
- Upload the complete updated website folder.
- Deploy the new version.
Your existing custom domains and SSL settings will remain connected. You don't need to repeat the original hosting setup every time you update your website.
Cloudflare Free Hosting Limits
The Workers Free plan includes the following limits according to the referenced Cloudflare documentation. Check the official links below for current limits before relying on these figures.
| Feature | Free Plan |
|---|---|
| Static asset requests | Unlimited |
| Static asset storage charges | None |
| Static files per Worker version | 20,000 |
| Maximum individual static file size | 25 MiB |
| Workers per account | 100 |
| Worker script requests | 100,000 per day |
It's important to understand that the daily Worker request limit applies to requests that execute Worker scripts, not requests that simply serve static assets.
For an ordinary HTML website without server-side Worker code, static asset requests are free and unlimited under the current pricing model.
For up-to-date information, refer to Cloudflare's Static Assets Billing and Limitations and Workers Platform Limits.
Frequently Asked Questions
Is Cloudflare website hosting really free?
Yes. You can host static websites using Cloudflare Workers Static Assets without paying monthly hosting fees. Domain registration and optional paid services are separate expenses.
Can I host a website without purchasing a domain?
Yes. You can use the default workers.dev address provided by Cloudflare if you don't have your own domain name.
Can I host a WordPress website on Cloudflare Workers?
Not as a traditional WordPress installation. This static hosting method doesn't provide a conventional PHP and MySQL hosting environment. However, you can export a WordPress website as static HTML files and host those files on Cloudflare.
Does Cloudflare provide free SSL certificates?
Yes. Cloudflare automatically provisions and manages SSL certificates for supported custom domains connected to your Worker.
Do I need GitHub to host a website on Cloudflare?
No. The direct upload method allows you to deploy your website files without using GitHub, GitLab, or command-line tools.
Can I host multiple websites for free?
Yes. You can create separate Workers for different static websites, provided you stay within the applicable account and platform limits.
Does Cloudflare provide email hosting?
This website hosting setup doesn't include a traditional email mailbox. You can use a separate email hosting provider or configure Cloudflare Email Routing to forward incoming emails to an existing mailbox.
If you're planning to launch a simple website, portfolio, or business landing page, Cloudflare Workers Static Assets is a practical alternative to conventional shared hosting. For my DimenCare.com website, the setup eliminated the need for a separate hosting subscription or paid SSL certificate.


