In this tutorial I am going to explain, how to create a simple slideshow using Mootools.If you like to add this slideshow to your website or blogger blog then follow the steps given below.
1.Login to your blogger dashboard--> layout- -> Edit HTML
2.Don't Click on "Expand Widget Templates"
3.Scroll down to where you see ]]></b:skin> tag:
4.Copy below code and paste it just before the ]]></b:skin> tag.
/* slideshow */
.sample{padding:20px 10px; margin:4px 0 25px 0; border:1px solid #e1e1e1}
#box2{
position:absolute;
}
#box2 span{
display:block;
float:left;
}
.buttons{text-align:center;padding:5px;}
.buttons span{color:#0080FF;padding:0 5px;cursor:pointer;font:10px Verdana}
.buttons span.active, .buttons span:hover{background:#0080FF;color:#fff}

.mask2{
position:relative;
width:240px;
height:180px;
overflow:hidden;
}
5.Scroll down to where you see </head> tag:
6.Copy below code and paste it just before the </head> tag.
<!-- mootools -->
<script src='https://ajax.googleapis.com/ajax/libs/mootools/1.3.1/mootools-yui-compressed.js' type='text/javascript'></script>
<!-- Slideshow -->
<script type='text/javascript'>
//<![CDATA[
var noobSlide=new Class({initialize:function(a){this.items=a.items;this.mode=a.mode||'horizontal';this.modes={horizontal:['left','width'],vertical:['top','height']};this.size=a.size||240;this.box=a.box.setStyle(this.modes[this.mode][1],(this.size*this.items.length)+'px');this.button_event=a.button_event||'click';this.handle_event=a.handle_event||'click';this.onWalk=a.onWalk||null;this.currentIndex=null;this.previousIndex=null;this.nextIndex=null;this.interval=a.interval||5000;this.autoPlay=a.autoPlay||false;this._play=null;this.handles=a.handles||null;if(this.handles){this.addHandleButtons(this.handles)}this.buttons={previous:[],next:[],play:[],playback:[],stop:[]};if(a.addButtons){for(var b in a.addButtons){this.addActionButtons(b,$type(a.addButtons[b])=='array'?a.addButtons[b]:[a.addButtons[b]])}}this.fx=new Fx.Tween(this.box,$extend((a.fxOptions||{duration:500,wait:false}),{property:this.modes[this.mode][0]}));this.walk((a.startItem||0),true,true)},addHandleButtons:function(a){for(var i=0;i<a.length;i++){a[i].addEvent(this.handle_event,this.walk.bind(this,[i,true]))}},addActionButtons:function(a,b){for(var i=0;i<b.length;i++){switch(a){case'previous':b[i].addEvent(this.button_event,this.previous.bind(this,[true]));break;case'next':b[i].addEvent(this.button_event,this.next.bind(this,[true]));break;case'play':b[i].addEvent(this.button_event,this.play.bind(this,[this.interval,'next',false]));break;case'playback':b[i].addEvent(this.button_event,this.play.bind(this,[this.interval,'previous',false]));break;case'stop':b[i].addEvent(this.button_event,this.stop.bind(this));break}this.buttons[a].push(b[i])}},previous:function(a){this.walk((this.currentIndex>0?this.currentIndex-1:this.items.length-1),a)},next:function(a){this.walk((this.currentIndex<this.items.length-1?this.currentIndex+1:0),a)},play:function(a,b,c){this.stop();if(!c){this[b](false)}this._play=this[b].periodical(a,this,[false])},stop:function(){$clear(this._play)},walk:function(a,b,c){if(a!=this.currentIndex){this.currentIndex=a;this.previousIndex=this.currentIndex+(this.currentIndex>0?-1:this.items.length-1);this.nextIndex=this.currentIndex+(this.currentIndex<this.items.length-1?1:1-this.items.length);if(b){this.stop()}if(c){this.fx.cancel().set((this.size*-this.currentIndex)+'px')}else{this.fx.start(this.size*-this.currentIndex)}if(b&&this.autoPlay){this.play(this.interval,'next',true)}if(this.onWalk){this.onWalk((this.items[this.currentIndex]||null),(this.handles&&this.handles[this.currentIndex]?this.handles[this.currentIndex]:null))}}}});

//]]>
</script>
<script type='text/javascript'>
window.addEvent('domready',function(){

//SAMPLE 2 (transition: Bounce.easeOut)
var nS2 = new noobSlide({
box: $('box2'),
items: [0,1,2,3,4,5,6.7],
interval: 3000,
fxOptions: {
duration: 1000,
transition: Fx.Transitions.Bounce.easeOut,
wait: false
},
addButtons: {
previous: $('prev1'),
next: $('next1')
}
});

});
</script>
7.Now Click on "Save Templates"
8.Now go to Layout-->page elements and Click on 'Add a Gadget'.
9.Now Select 'HTML/Javascript' and add the code given below and click save.
<h2>SlideShow</h2> <div class="sample"> <div class="mask2"> <div id="box2"> <span><img alt="Photo" src="YOUR-IMAGE-ADDRESS"/></span> <span><img alt="Photo" src="YOUR-IMAGE-ADDRESS"/></span> <span><img alt="Photo" src="YOUR-IMAGE-ADDRESS"/></span> <span><img alt="Photo" src="YOUR-IMAGE-ADDRESS"/></span> <span><img alt="Photo" src="YOUR-IMAGE-ADDRESS"/></span> <span><img alt="Photo" src="YOUR-IMAGE-ADDRESS"/></span> <span><img alt="Photo" src="YOUR-IMAGE-ADDRESS"/></span> <span><img alt="Photo" src="YOUR-IMAGE-ADDRESS"/></span> </div> </div> <p class="buttons"> <span id="prev1"><< Previous</span> <span id="next1">Next >></span> </p> </div>
Note : Replace 'YOUR-IMAGE-ADDRESS' with your images addresses.
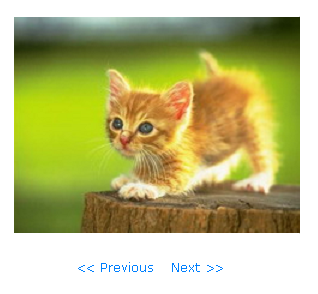
It will look like this :
View Demo

hai
You posts were too nice.. I fell like to exchange link ith you... If you are intersted revert me back!!
WoW!!! great cool
Would you please add my to your blogger roll
i have add you in my bloglists. please add me..
Thank You...
Your site great and excellent information about blogger thanks
nice work.
hi
your information are very useful for us but i cant get result properly pls help me
Hi. How to get the image address? i mean must i use picasa or the image must be from my blog only?
you can host your image on Picasa or other place.